Tuesday, September 18, 2012

Mentoring Students....the last stages

Ildiko finishes up tinning her piece. She holds the soldering iron in one hand and the solder in the other keeping both low to her work area. In the close, up you can see see her progress as the tape goes from copper to shiny silver.


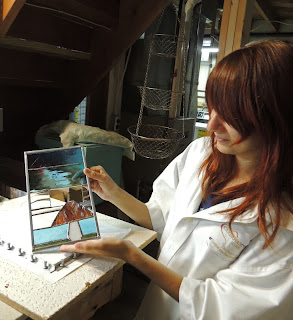
Anna now gets to release her piece from the board to look at her results while holding it up to the light. I think she looks pleased. In the photo below you can see her choice of textured glass more clearly.


 And now Ildiko gets to do the same. This is of course the most exciting moment. After both girls have tinned both sides of their work, they will proceed to "laying a bead" over the area they have just tinned. This can be a tricky part and requires lots of practise, but they both did a lot of concentrating and the results were great.


Sunday, September 9, 2012

Mentoring Students .......Copper Foiling

This day both Anna and Ildiko were at the studio ready to begin taping their pieces. They started with a sticky sided tape made of very thin copper foil. Each piece must be entirely taped, and burnished. The copper tape will allow the pieces to hold together when we solder them and will also give them a strong bond. The girls need to have each piece clean and free of glass dust for the tape to adhere.

Anna burnishes the piece of tape she has just applied. I ussually use very high cost tools for this process like a wooden clothespin or wine cork. This will make the tape smooth and closely adhered to the glass.

 Ildiko uses a Foiler tool to help wind the narrow tape around the edge of the glass.

  Once the piece has been foiled the girls can begin to tin their work. This process involves the use of solder which is part tin and part lead, and a soldering iron to melt the solder onto the copper tape which has been thoroughly fluxed. The flux will help the solder to adhere to the the tape.
We're getting closer to our goal and of course when we can lift the piece off the the board and see how the light projects through the piece can be an exciting moment. Remember to click on the photos for a larger view. Until next time....


Monday, August 27, 2012

Next Chapter, Grinding....

And another day of fun begins, at least it was for me and I certainly hope it was for the girls. This day we proceeded to grinding. Once the pieces were cut, we could start to fit them into the framework and grind the edges smooth until all the pieces fit together like a puzzle. Here Anna takes her first piece to the diamond wheel and gently smoothes the edges.

 Up close and personal,at the grinder.
 After grinding, Anna takes the piece back to her framework to see if the fit is good. If not. then she will take a marker to outline what still needs to be removed.
 Below Ildiko takes a final look to make sure all her pieces fit together cleanly.
 
 Looks pretty good to me! Both girls did a nice job of  cutting and grinding.

Before we move on to applying the copper tape though, every piece needs to be cleaned.
 
Next up ....Copper Foil Tape
Remember to click on the photo for a closer look.

Saturday, August 25, 2012

Mentoring Students....

When asked what I had been doing on my "summer vacation" recently, I had the opportunity to tell of my experience mentoring two young students  through the ArtStart Fusion Project. Let me introduce you to Ildiko (think Indigo as she so helpfully pointed out) and Anna, my students. Through a program put forth by Art Start of Rhinelander   http://www.artstartrhinelander.org/exhibitions---events.html regional working artists are paired with local area high school age students to  participate in the age old tradition of master and apprentice. Our goal was to create a variety of visual art that expresses both the individuality of each participant, as well as the creativity resulting from artistic collaboration. From there we began our journey. I asked both students to create a piece that would stand alone but would be visually pleasing when presented as one work of art. And of course I was participating in this as well.
First we, needed to come up with a design that we were all in agreement with. I asked them to stay with geometric designs as opposed to circles and curves to ease into cutting the glass. They learned that there is a difference in drawing designs for stained glass as opposed to sketching for the sake of sketching. When cutting glass it has to be cut edge to edge, so the lines in the design become very important. In a drawing you might use bolder or finer lines to show shading, but with glass you need to do that using the color of the glass or the lines that are created when 2 pieces of glass unite. After making all our lines into cuttable pieces and doing away with any extraneous lines our final design was complete. Anna's is on the left, mine is in the middle and Ildiko's is on the right. We have a common thread running through all 3 pieces which anchor them together, but allow them to stand alone. Now it was on to making 2 more copies of each design, one master copy to refer to with all pieces numbered  and colors specified, one to cut the pattern pieces out, and one to use as a guide for our design.

Here Ildiko is at the drawing table putting the finishing touches  on her design.I love how the person on her T-shirt seems to be very interested in what she's doing.
 While working on our designs we also chose the glass we all wanted to work in. We selected colors that we all could use , but we didn't necessarily use all the colors in each of our designs.Ildiko holds a piece of glass to the light to see what it will look like when hung in a window.

After cutting out her pattern piece she adheres it to the glass and begins to cut.....edge to edge remember.

Anna has cut out her pattern pieces and is also adhering them to the glass she has selected. Then she will begin the process of cutting. Next up we'll proceed to grinding. And I just have to say that they were not a squeamish lot....they took to cutting like it was second nature!

 Next chapter.....grinding and putting all the pieces together.

Thursday, July 5, 2012

Emmet Gets Wet...

Emmet tries to jump on the boat, but misses and falls in between the boat and dock for his first time in the water. He was a little puzzled, but apparently it's all good!

Tuesday, June 19, 2012

New Work for Art in the Yard


 Art in the Yard is this coming Saturday and here are a few photos of some of the pieces that will be in the show. Cheeck out my FaceBook page for more.


Friday, June 15, 2012

Art in the Yard....in Land O' Lakes

I'll be up in Land O' Lakes as one of the Art Gypsies for this show. Come up and take a peek at some new work...or maybe even try it on and then it might just have to go home with you!

Monday, June 11, 2012

More Umlauf Gallery work....

 Freshwater pearls, with silver dipped old copper beads. Handmade Fine Silver piece with a lampwork glass lentil bead in black and blue silver glass.

Dichroic glass bead with tiny Murrini suspended from a Sterling Festoon on green garnet.
 Glass twistie bead  with Murrini and Fine silver charm suspended from a three ring Fine Silver bail on a cable cord.
 An irregular flat disk and concave disk riveted together by a fine silver headpin and oxidized.
Softly etched blue lentil beads with silvered ivory stringer swirls on sterling loops. As always click on the photo to enlarge.